
Manure Composting 101
Manure Composting 101
Surprise! Surprise! But what most of us may regard as being our biggest problem may, actually, be our biggest asset on the road to being green. Manure on its own has a deservedly bad reputation. It can pollute both ground and surface water, attract flies, annoy non-horsey neighbors (even when not doing either of the above!) and provide a means to spread intestinal parasites. However, when manure becomes compost it undergoes an almost magical transformation into something that is beneficial to the earth and that just about everybody wants (even the non-horsey neighbors)! So, the sooner that we can turn all that impossible-to-give-away-manure into compost the better, right? WAIT! Before you grab your pitchfork and eagerly (well, maybe eagerly is not quite the word!) start piling up the manure you need to know what the higher-ups have decreed. No matter where you live I can just about guarantee that there are rules about “animal waste”. Whether County, City or HOA you need to find out what they require. Some forward-thinking places will not only allow composting but give you guidance on how to do it, others will require all manure to be removed, no composting permitted, and others fall somewhere in between. If you find yourself in one of those restrictive places, then you are going to have to do as they say or risk getting tattled on by an unhappy neighbor and paying fines or worst-case scenario having to choose between moving or giving up your horses! Read your CC&Rs! More on possible solutions to this later. Remember, spreading manure around your pasture or arena is not composting and ultimately could cause problems, legal and/or physical.
I am sure that many of you are composting already. Good for you, you are already started on the path to sustainable horsekeeping. For ideas on what to do with your compost read my post-https://www.ecohorsekeeping.com/turningmanureintomoney. For those of you who aren’t yet composting, who don’t know how, or who would like to do it better, then read on. There are 2 kinds of composting methods, one is anaerobic (without oxygen) which requires a pit or closed chamber. Since most of us don’t have one of those, we are only going to be talking about aerobic (with oxygen) composting. There are probably as many ways of composting as there are people that compost. A lot depends on what materials you have readily available but there are some basic rules and tools.
Rule # 1 – Containing – It is extremely important that you either contain your piles or make sure that they are on absolutely level ground and kept covered with no possibility of runoff even in the heaviest downpour. Manure water can contaminate groundwater, get into streams or even washes in the desert and potentially cause a lot of harm or at the very least give your non-horsey neighbor something else to gripe about! Compost piles can be kept in something as basic as bins made of scrap wood or as fancy as a permanent, concrete floored, 3- sided structure. The common element is that there should be enough bins, 3, minimum, 4 or more, better, to handle the amount of manure produced on your farm long enough to turn it into compost. Weather can also have an impact on composting. It may take longer in cold weather for a pile to compost, but the horses will still keep producing manure, so you may have to have room for an extra bin or two to handle it. Composting by the aerobic method requires oxygen (air) to be able to get to all parts of the pile. Too large of a pile means that the oxygen can’t get in therefore the size of your pile matters and determines how many piles that you need. An optimum size for a compost bin would be 4′ square and high. However, make sure that you have room to maneuver! If you are turning by hand, then you will need space to handle pitchforks and shovels and if you are using a tractor with a bucket you will need room for backing and turning around. Removable dividers and fully opening gates in the front will make access easier. If you need more room, make the space wider but not deeper front to back. Compost piles should be covered or roofed so that you can control the amount of moisture reaching the pile. Tarps or heavy plastic will work and may even help speed up the process. Just be sure that they cover the pile completely and are secured well enough not to blow off in the mother of all thunderstorms! A permanent, hinged cover makes it easier to access the pile. If runoff is potentially a problem, then you will need at least the lower part of perimeter walls to be made of something solid. Possibilities can range from bales of straw or spoiled hay to a permanent wall of concrete blocks, but you do not want ANY runoff!!! Choice of materials to build your compost container with are almost endless but try to use re-purposed and/or other environmentally friendly ones as much as possible. Make sure that they do not include any treated wood including railroad ties due to potential contamination of your compost and the environment around it.
Tip – Please do not locate your compost area right next to your property line. I know that you own the land but if you happen to have or later acquire a neighbor who will blame every fly that he sees on the horses next door then you will just be adding fuel to his fire if he sees you hauling wheelbarrows full of manure and dumping them right next to his fence! Instead locate it someplace readily accessible from your stable to both a wheelbarrow and a pickup, then plant things around it. Annuals at first, giving perennials a chance to get going. Everything should thrive as you will have plenty of compost to put on them! Make it something to show off not hide! Then, when your compost is ready, offer him a bag for his garden!
Rule # 2 – HEATING – Manure does not become compost without heating up and it needs an appropriate amount of ingredients, moisture, and oxygen to heat up. In other words that 2-year-old pile of manure behind the barn is still just manure unless it happened to have just the right mix of manure, bedding, green material, moisture and, oxygen so that it heated up on its own and became compost. Not too likely. It probably just slowly lost its nutrients and decomposed which is not the same as composting! Compost usually needs to have some help from us. Don’t worry it sounds more difficult than it really is! Without getting too much into specifics since there are so many variables in what we feed our horses – alfalfa? grass? pellets?, where we live – desert? mountains?, our choice of bedding – straw? shavings? none? The one constant is manure! You will have to experiment with your own available ingredients to determine the mixture that works best for you. But basically, you will be layering, like making lasagna, several inches each of manure, bedding, hay, plus any other clean green stuff that you have (lawn clippings, weeds, etc.). You will soon figure out your own recipe! Don’t try to overthink it. A lot of us don’t have lawns anymore for grass clippings and in some places out west, not even weeds do well, so you may not have enough greens. One way to make it easier on yourself is to keep a bale of spoiled alfalfa handy so that when you dump out your wheelbarrow load of manure you can top it off with some greenish alfalfa. You can also use kitchen waste but never put any dairy or meat related items into any compost pile! When your pile reaches a certain size, usually from 3 to 4 feet high, it should start heating up. At this point, you should stop adding any more manure or other materials to it and start a new pile. If your pile doesn’t heat up in our arid climate it probably needs more green stuff and/or moisture. The green factor plays an important part in getting your pile to heat up, but it will still need a regulated supply of moisture. So, as you build your pile you will be adding water as needed, to keep it moist but not sopping wet. We desert dwellers will need to be paying extra close attention to the moisture level of our pile. Unless it is the rainy season then much of what we will be adding to our piles is going to be on the dry side and if we aren’t careful about keeping the pile wet then the whole thing could disappear in a dust devil!

Tip: When choosing a location for your compost piles make sure that a source of water is within easy reach. Using harvested rainwater would be a great eco-choice and earn you extra points!
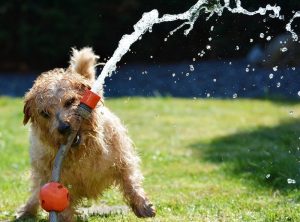
Okay, but get him to aim it at the compost pile!
Rule #3 – TURNING – Compost piles need to be turned and re-oxygenated to keep them heating up and to make sure that everything gets composted. According to the Organic Certification Code of Federal Regulations #205.203, – in order to kill the maximum number of weed seeds, your pile needs to heat up to at least 170 degrees and stay between 131 – 170 for 15 days with a minimum of 5 turnings! This is when you are putting that compost thermometer to work! Potential consumers of your, now valuable, product will not be happy if their garden sprouts bunches of things that they didn’t plant! When your pile quits heating up after being turned then it has changed into something desirable and beneficial, compost! Depending on the number of horses contributing manure and the age and condition of the turner’s back, the turning can be done with something as simple as a pitchfork or as complicated as a front-end loader on a tractor. Yes, I know that the tractor likely is using fossil fuel, one step at a time, right now we are getting the compost turned.
If you have the room and materials, then you might want to try worm or vermicomposting. You definitely need containers or enclosed bins because the worms will not stay put otherwise, but the big advantage is that you don’t have to do any turning. The worms do it! The other plus is that worm droppings or castings are worth a whole lot more than the compost alone would be! So, my suggestion is to try it on a small scale and if it works for you then go for it. Just remember a few things; worms can’t take the heat of a regular compost pile so always either age the ingredients that you are giving them or (easier) give them enough space to move away if necessary. They also need enough moisture to function but not so much that they drown and last, of all they need to be kept covered, there are a lot of things that like to eat earthworms besides the early bird! More on vermicomposting later.

Speaking of!!
This is just a short primer on composting for those of you who haven’t done it yet and we plan on having more how-to information and, also, ideas on monetizing it see on down the trail.
List of Composting Tools
Tool # 1 Compost Thermometer – available from most garden supply stores. Get the longest one! See links below.
Tool # 2 Pitchfork – If you only have from 1-4 horses and a good back then you can probably manage your composting with a pitchfork and/or a garden fork.
Tool #3 Front-end Loader- More than 4 horses or if you have a bad back you are going to need one of these or a BobCat and then we will have to show you how to offset their carbon footprints later. At this point remember that you are doing something good for the earth with it.
Links to Websites: You can find this compost thermometer in several places online including amazon.com. but Arbico, which is located in Tucson, and Planet Natural have been focused on doing good for this planet for years and deserve our business!
https://www.arbico-organics.com/product/compost-thermometer/garden-tools-supplies
Comments
Manure Composting 101 — No Comments
HTML tags allowed in your comment: <a href="" title=""> <abbr title=""> <acronym title=""> <b> <blockquote cite=""> <cite> <code> <del datetime=""> <em> <i> <q cite=""> <s> <strike> <strong>